A step-by-step guide for first-time community managers
Transform your vision into a thriving online community with this practical 90-day roadmap covering strategy, platform selection, content planning, and member engagement.
The internet is a very different place today than it was five—or even two! —years ago. Social networks are losing trust as AI-generated content and influencer marketing, which is often perceived as inauthentic, fills newsfeeds. While the human-to-human connection these platforms originally promised has faded, the human need for community has not.
“Smaller, purpose-driven communities are the future,” according to a study by Vox Media and The Verge.
Organizations that want to connect with their audience—be they customers, alumni, or donors—can leverage small, online communities to build meaningful relationships that foster engagement and brand loyalty.
Sound interesting?
If you’re ready to start building an online community, this is your step-by-step guide to launching a purpose-built platform in 90 days. While that may seem like a long time, the effort and attention you put into building a thoughtful launch strategy will support your community building efforts from Day 1 to Year 10.
Who is this guide for?
We’ve created this guide to support community managers at every stage of their journey—whether you’re launching a new online community for your organization’s members, customers, students or alumni; or transitioning an existing audience away from social media to a fully owned, branded space.
By nature, small online communities are flexible, capable of adapting to a diverse set of organizational—and member—needs. This guide will show you how to create an online community that creates tangible value for you and your members.
Phase 1: Pre-launch planning (Days 1-30)
Week 0: The chicken and egg problem
One of the biggest challenges every new community faces is this: members join for other members, but you don’t have any yet. It’s the classic chicken and egg problem, and solving it starts before you ever open the doors of your community.
Before launch, focus on building an audience, not just a platform. Use your existing channels to develop a waitlist and build hype. Tease your community on social media or in your email newsletter. Start engaging potential members in conversations about the problems your community will solve.
The goal is to arrive at launch day with a group of people who are already invested in what you’re building, rather than a group of people you need to convince from scratch. This process can be conducted before and in tandem with the following steps, and can even be used to help inform the mission and purpose of your community.
Week 1: Foundation and strategy (Days 1-7)
Starting a new project is exciting! You’ve got energy and ideas flowing, and you can’t wait to get started. We get it. It’s so easy to jump on the “community bandwagon” without really answering two simple yet critical questions:
- What is the goal of this community?
- What business need or issue is it going to help me solve?
If you can’t answer those two questions, then it’s time to hit pause. For your community to succeed, you must create a compelling and comprehensive business case for it—detailing how it will support company-wide goals AND how it will provide value to your members.
Here’s how to get started:
Define your community’s purpose and vision
- Identifying the core problem your community solves – why does your community exist? What is the long-term impact you want it to create?
- Crafting a clear mission statement – summarize who the community serves, what it helps them do, and why it matters.
- Defining your community’s unique value proposition – what is the specific value members will gain by joining and participating?
- Differentiating from existing communities in your space – there are a lot of online communities to choose from. What makes yours distinct?
Identify your target audience
- Creating detailed member personas – build simple profiles that capture your ideal members’ goals, challenges, and expectations.
- Understanding member motivations and pain points – what will inspire members to join, take part, and return?
- Mapping the member journey from awareness to active participation – outline how someone moves from discovering your community to becoming an engaged member.
- Determining initial community size goals – Set a realistic target for how many members you want to attract in the first 90 days.
Establish success metrics and KPIs
- Setting realistic 90-day goals – these goals should match your capacity, audience, and launch timeline.
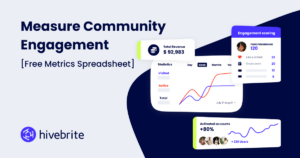
- Defining key metrics – how will you track the success of your community? This may be member growth, engagement rate, or content contribution. Learn more about establishing metrics here.
- Establishing baseline measurements – whether you’re moving from a chat tool like Slack or Discord, or starting from Member 0, you need to record your starting point so you can measure progress clearly over time.
- Creating a simple tracking system – many community platforms, like Hivebrite, offer integrated analytics to help you track your goals.
Week 2: Platform selection and setup (Days 8-14)
Evaluate platform options
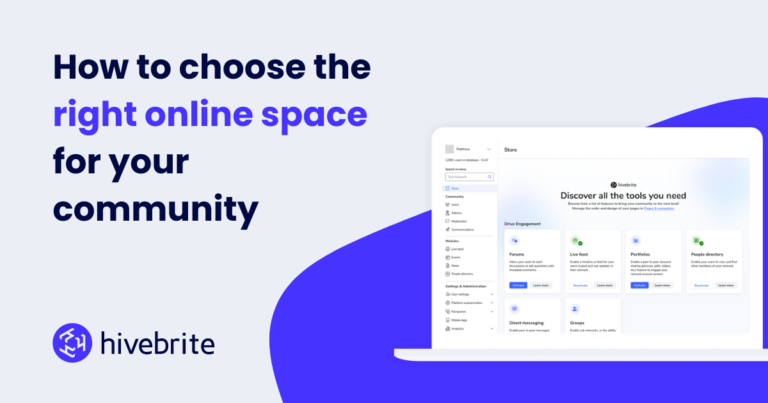
- Overview of community platform types – the type of platform you choose should match the needs of both your organization and audience. Hivebrite, for example, offers a collection of modules like forums and a live feed to help you customize your community.
- Key criteria for platform selection – compare platforms based on what you need now, what you may need later, your budget, and what your organization can realistically manage.
- Comparison framework for decision-making – try using a scoring system to evaluate platform options objectively, which will help organize opinions and reduce personal bias.
- Common beginner mistakes – avoid overbuilding, choosing a platform based on what your organization wants rather than what your members need, and prioritizing tech features over human experience.
Establish a budget for your community
- Platform and technology costs – conduct initial research on community platform pricing to get a ballpark on your options. Don’t forget to include website development, hosting, domain, and technical support fees.
- Staff and personnel – the cost and scope of your community depends on the people dedicated to running it. Consider the salary of full-time, part-time, and even temporary staff required to launch and manage your community.
- Content and programming – what services and resources will you provide members? Factor in the cost of blogs and other written content, video production, and even webinar or other event expenses.
- Marketing and growth – set a budget for both your launch promotions and ongoing community awareness campaigns. Be sure to account for social media management, email marketing expenses, and any digital advertising you may conduct.
Read more about setting a financial plan for your online community here.
Set up your community infrastructure
- Technical setup checklist – document the essential setup steps so nothing important is missed during launch preparation. This will also help future team members understand how the community was built, providing context for future growth and troubleshooting.
- Essential features to configure first – what are the features members need immediately? Think: profiles, notifications, posting permissions, and onboarding prompts. Avoid launching too many features all at once. It’s best to start small and build.
- Creating a welcoming first-impression experience – you want your community to feel like home from the moment your members enter. Think about what will spark the desire to explore and engage from the moment they hit “sign in.”
- Mobile optimization considerations – More than half of internet users turn to mobile devices over their desktop. Make sure your community is easy to access, read, and participate in from a phone.
Design and branding
- Developing visual identity aligned with your brand – choose colors, fonts, imagery, and design elements that reflect your broader brand identity. Some community platforms, like Hivebrite, enable full brand customization to make the platform uniquely your own.
- Creating navigation structure and information architecture – organize spaces, categories, and menus so members can self-navigate and find what they need.
- Designing key pages – think about the core pages that help members understand your community, set expectations, and help them get started. Think: homepage, about, community guidelines, and a Start Here page.
- Accessibility best practices – use inclusive design choices that make your community easier for more people to navigate and participate in.
Week 3: Community guidelines and governance (Days 15-21)
Develop community guidelines and rules
- Creating clear, enforceable community standards – your standards should both help guide member behavior and give community managers clear guidelines on what is and isn’t acceptable.
- Balancing openness with safety – how can you encourage honest participation while still protecting members from harmful or disruptive behavior? Try thinking through possible scenarios, then create guidelines for how you support and protect your members.
- Addressing common behavioral issues proactively – identify likely challenges so your guidelines can help your team understand how to respond.
- Examples of effective community guidelines – again, your guidelines will reflect who your community is built for and why. Check out this full guide on developing community guidelines for examples and ways to get started.
Establish moderation framework
- Determining moderation approach (pre-moderation vs. reactive) – Should member content be reviewed before it goes live? Or addressed after issues appear? Each system has its pros and cons, so it’s important to assess this in advance.
- Creating a moderation workflow – map the steps moderators should take when reviewing content, responding to reports, or handling concerns.
- Defining escalation procedures – when there’s an issue, what steps will your team take to address it? Identify the stages of escalation, from the initial review to action taken.
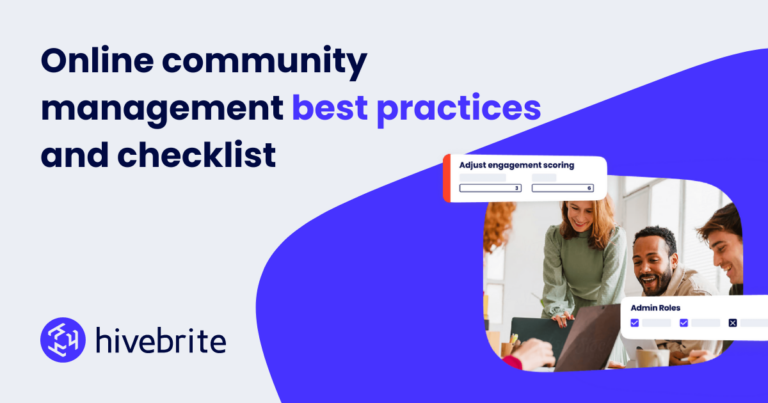
- Tools and features for effective moderation – many online community platforms offer built-in content moderation. Hivebrite provides AI and automation features to help community managers review content quickly and seamlessly.
Build your core team
- Identifying roles needed – who do you need on your team to support community engagement? While some will be on your internal team, others can members themselves! Think: content moderators, ambassadors, content creators, and event managers.
- Recruiting your first team members – look for people who understand the community’s purpose and can contribute reliably from the beginning. These folks should be championing your community before it has even launched.
- Creating role descriptions and responsibilities – give each team member a clear description of what they own, how they help, and where their role begins and ends.
- Setting up team communication channels – establish how and where your team will discuss the platform’s build-out, day-to-day management, and big picture strategic sessions.
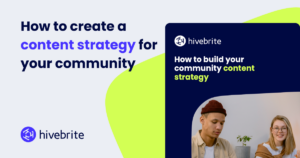
Week 4: Content strategy and seeding (Days 22-30)
Develop your content pillars
- Identifying 3-5 core content themes – what are a few focused themes that reflect your community’s purpose, member needs, and value? Try to define themes that you will be able to continue developing content for over the long-term.
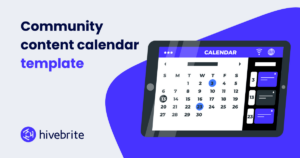
- Creating a content calendar template – build a simple planning tool to organize topics, formats, posting dates, and ownership. Here’s an easy-to-use community content calendar template to get you started.
- Balancing educational, inspirational, and community-driven content – how will you mix practical guidance, motivating stories, and member-led conversations?
- Planning content formats – different content formats resonate with different audiences. Look back at your member personas and decide if blogs, live feed discussions, resources like guides, or events and webinars are the best fit.
Seed initial content
- Creating 10-15 high-quality seed posts – write strong starter posts that invite conversation, answer common questions, or model valuable contributions. The most effective seed posts are typically: open-ended questions that are easy to answer, resources that deliver immediate value, and personal or behind-the-scenes posts that build trust and humanize your brand.
- Developing FAQ and resource library – create a central place for key answers, tools, and references members will need early on. You will likely add to this over time, but it’s important to have starter content when you welcome your first members.
- Preparing welcome materials for new members – develop simple materials that explain what the community is, how to participate, and where to start. This could be an interactive guide, a slide deck, or welcome webinar.
- Testing content with beta users – share early content with a small group to see what feels clear, useful, and engaging.
Plan member onboarding experience
- Designing the new member journey – map what members should see, receive, and do from sign-up through their first meaningful interaction. Make it friendly and easy to navigate so new members know what to do next. Explore this free onboarding guide.
- Creating welcome sequences (emails, in-platform messages) – use automated messages and drip-campaigns to introduce the community, highlight key resources, and prompt early engagement.
- Developing quick-start guides – give members a simple path for setting up their profile, finding and connecting with other members, and discovering resources.
- Planning first-week engagement touchpoints – how will you check-in with new members? This could be a survey or personal outreach after a given period of time.
By now, you’ve put a lot of work into your new community. Time to start welcoming new members, right? Well, sort of. No matter how much planning and preparation you’ve put into a new community, there will be kinks. Before opening it up to the public, we recommend you do a soft launch, inviting beta testers into the environment. This is an opportunity to test all your theories, find any bugs, and make last minute tweaks to ensure the best experience when you truly go live.
Week 5: Beta launch (Days 31-37)
Invite your founding members
- Identifying ideal founding member profiles – bring in a small group of early members who can help test the experience and shape the community before launch. These founding members will likely be early advocates, helping others participate and engage once you’re live.
- Crafting personalized invitations – let’s not be generic here. Explain why each person was chosen, why you value their insights, and what role they can play in the early community.
- Setting expectations for beta participation – clarify what beta members are being asked to do, how much time it may take, and how their feedback will be used.
- Creating exclusivity and excitement – let your founding members create some buzz! How can you help them feel valued, involved, and excited to contribute?
Gather initial feedback
- Setting up feedback mechanisms – use simple channels like surveys, feedback forms, office hours, or dedicated discussion threads to capture beta tester input.
- Conducting user testing sessions – setup live calls with your testers to observe how they navigate the community. This will help you identify friction in real time.
- Identifying technical issues and UX problems – look for bugs, confusing flows, broken links, and barriers that make participation harder than it should be.
- Documenting requested features and improvements – keep a record of member requests so you can spot patterns and make informed decisions. You’ll want to continue doing this throughout the life of your community.
Refine and iterate
- Prioritizing changes based on feedback – focus on fixes that came up the most often in beta testing. They should remove barriers, improve clarity, or create a better first impression.
- Making quick wins visible to beta members – show your appreciation to your beta users by demonstrating when their feedback leads to action.
- Communicating improvements transparently – share what changed, what is still being reviewed, and why certain updates may take longer.
- Building trust with early adopters – how can you demonstrate that this community is responsive, thoughtful, and worth their continued participation? If you do this in a meaningful manner, you’ll build valuable relationships with potential advocates and influencers.
Week 6: Early engagement strategies (Days 38-45)
Activate founding members
- Launching initial discussions and activities – start with low-barrier, targeted conversations that make it easy for members to contribute.
- Encouraging member-to-member interactions – how can you prompt members to respond to each other instead of only engaging with your team? You may need to tag other beta testers, encouraging them to respond or make direct, 1:1 connections.
- Recognizing and rewarding early contributors – celebrate members who participate so others understand what valuable engagement looks like.
- Creating opportunities for members to showcase expertise – most people enjoy sharing their skills and knowledge. Make it easy for them to do so by posing thoughtful questions you know they’ll be likely to engage with or asking them to co-host a webinar or contribute a blog.
Test community rituals and programs
- Introducing recurring features – use formats like weekly threads, challenges, or AMAs to build rhythm, familiarity, and consistent participation. This not only makes it easier to generate content on an ongoing basis, but it also provides your members with predictable engagement opportunities.
- Experimenting with engagement formats – some content formats will resonate more than others, depending on the audience. Try different types of prompts, events, and activities to learn what sparks the best response.
- Measuring participation rates – track how many members view, react, reply, attend, or contribute to each activity.
- Identifying what resonates with your audience – Are there patterns in what members engage with most? Use those insights to refine future programming.
Build social proof
- Collecting testimonials from beta members – ask early members to share what they value about the community and how it has helped them. You can use this across your promotional and onboarding materials.
- Documenting early wins and success stories – remember: show don’t tell! Use your member success stories to demonstrate the value your community provides.
- Creating shareable moments – turn strong testimonials, milestones, or member achievements into content others can easily share.
- Preparing launch marketing materials – this early social proof is gold! Use it to create emails, social campaigns, landing page copy, and partner outreach assets.
Phase 3: Public launch (Days 46-60)
At last! It’s time for the big day. Everything that you’ve worked for the last two months will now be put to test.
Now’s the time to finalize your launch strategy and get the word out to your target audience. We’ll take a look at how you can leverage your existing online presence to promote your community and potentially generate some fresh hype.
In addition to having your marketing team on deck, you’ll also want tech support handy. More likely than not there will be an unforeseen detail on your launch day. Ask your team to keep their eyes and ears open to glean as much feedback from your newly joined members as possible.
Week 7: Launch preparation (Days 46-52)
Finalize launch strategy
- Setting launch date and timeline – choose a launch date and work backwards to detail the milestones your team needs to hit before, during, and after launch.
- Creating launch announcement content – this is critical! This initial messaging sets the entire tone for your community experience. Remember to refer to your mission statement as you develop promotional and media relations content.
- Preparing email campaigns – One email is not enough. Think about staggering your launch emails over a series of days or even weeks.
- Coordinating cross-channel promotion – Plan how your launch will appear across email, social media, partners channels, website, and other relevant outlets. If you’ve been working with partners to develop your community, help them promote your work by creating sharable social assets.
Prepare your team
- Briefing moderators and ambassadors on launch expectations – make sure your team is on the same page. Provide clear guidance on how to welcome members, answer questions, and model participation.
- Creating response templates for common questions – Prepare in advance simple replies for likely questions so you can respond quickly and consistently.
- Establishing launch day protocols – Define who is managing what, how issues will be handled, and when something needs to be escalated.
- Setting up monitoring and response systems – use alerts or AI-powered content moderation to track activity and respond to members in real time.
Scale your content
- Creating a launch week content calendar – outline your posts, conversation prompts, emails, events, and resources so your launch feels intentional and coordinated.
- Scheduling automated welcome sequences – set up automated messages or a drip campaign that greets new members, explains how to build their profile, and encourages participation.
- Preparing high-value resources and incentives – offer useful resources, perks, or opportunities that give people a clear reason to join now.
- Planning special launch events or activities – while much of your community’s engagement will be conducted asynchronously, nothing beats “live” engagement like an event where members can connect face-to-face.
Week 8: Launch week (Days 53-60)
Execute launch campaign
- Multi-channel announcement strategy – make sure your announcement hits all channels your organization has a presence, tailoring the message to match how users engage on each platform. Don’t forget video content!
- Leveraging existing audiences – converting your existing audience into members is the lowest hanging fruit. Explore how you can target your messaging based on your existing audience segments and partner channels.
- Creating buzz with limited-time offers or bonuses – everyone likes a good incentive! Consider offering high-value giveaways to the first 100 new members or doing random prize drawings.
- Managing launch day logistics – keep your team aligned on timing, responsibilities, approvals, and response needs throughout launch day.
Welcome new members at scale
- Monitoring new member influx – track sign-ups, activity, questions, and any bottlenecks.
- Ensuring smooth onboarding experience – though beta testing is over, you should continue to ensure new members can easily join, understand the space, and take their first action.
- Responding quickly to questions and issues – address confusion, bugs, and concerns before they slow momentum or frustrate new members. Consider doing so publicly to help create transparency and trust.
- Making new members feel valued immediately – what would make your first 100 members feel special? Acknowledging their initiative to try something new; respond to their comments quickly; and even send thank-you notes to early super-users.
Maintain momentum
- Daily content and engagement activities – publish simple, consistent prompts or activities that invite members to participate throughout launch week. You may need to do personal outreach to help members engage.
- Highlighting member contributions – showcase early posts, introductions, questions, and wins to show that they are seen and heard.
- Fostering connections between members – provide immediate value by introducing members with shared interests, goals, or challenges to encourage peer-to-peer engagement.
- Addressing technical or experience issues promptly – resolve platform or usability problems quickly so members stay focused on participating.
Phase 4: Growth and optimization (Days 61-90)
Your community is live! But the work’s not over. The weeks following your launch are the optimal time to make tweaks to your strategy that ensures sustained engagement and growth. It’s also a great time to tap members for feedback and referrals as they are (hopefully) still humming with the initial launch buzz. Here’s how to make the best use of the final two weeks of your 90-day community build-out.
Week 9-10: Sustaining engagement (Days 61-75)
Develop consistent content rhythm
- Establishing sustainable posting frequency – maintain a posting schedule that allows you to generate new content based on your team’s capacity and member activity.
- Balancing admin-created vs. member-generated content – both are important, but member-generated content is often harder to elicit in these early stages. You may need to conduct personal outreach to encourage members to post. Be sure to provide ideas or examples of successful posts.
- Creating templates for recurring content types – as you learn which types of content perform best, create templates to support recurring posts, polls, or surveys.
- Building a content creation workflow – define how content ideas are planned, assigned, drafted, approved, published, and reviewed.
Implement engagement tactics
- Gamification and recognition programs – continued engagement is all about creativity! Try using badges, shoutouts, leaderboards, or rewards to reinforce member activity.
- Member spotlights and success stories – highlight members’ experiences, wins, and expertise to recognize their value to your community.
- Exclusive events and experiences – offer members-only opportunities that create value beyond everyday discussion.
- Peer-to-peer connection initiatives – how can you help members find the right people to learn from, collaborate with, or support? Many community platforms like Hivebrite offer AI-powered member matching.
Grow your member base
- Organic growth strategies – leverage searchable content, shareable resources, and member advocacy to drive member recruitment.
- Referral programs and incentives – encourage existing members to invite others by offering recognition, perks, or simple rewards.
- Partnership and cross-promotion opportunities –collaborate with aligned organizations, creators, or communities to reach relevant new audiences.
- Paid acquisition considerations – ads or sponsored placements are worth testing based on your goals, budget, and conversion path. And don’t forget traditional media – in some markets radio or even old school posters are still effective.
Build a retention strategy
- Observing member growth vs. churn – while growth is visible and exciting, churn is often quiet and costly. Pay attention to who’s not coming back as much as who is joining. Watch for key signals like: members who signed up, but never completed their profile, members who engaged once and went silent, and members whose login frequency dropped.
- Developing a re-engagement sequence – combat early churn with a targeted re-engagement sequence like a personal message from a community manager, a curated “you might have missed” digest, or a direct invitation to an upcoming event.
- Gleaning audience insights – if it’s unclear why you’re experiencing churn, try conducting surveys or even direct outreach to “lost” members to help you understand what went wrong.
- Offering incentives to return – explore options to entice members to re-engage or rejoin your community. While some churn may be the result of poor product-market fit, some members may just need additional encouragement to tap back in.
Empower community leaders
- Identifying emerging community champions – look for members who consistently contribute, welcome others, and model the culture you want to build. They can help scale your community management and recruitment efforts.
- Creating pathways for member leadership – give members clear ways to host discussions, lead groups, mentor others, or support programming.
- Delegating responsibility and ownership – assign meaningful responsibilities so leaders feel trusted and the community becomes less dependent on your team.
- Building a sustainable volunteer program – create simple expectations, support, and recognition for volunteers who help the community thrive.
Week 11-12: Analysis and iteration (Days 76-90)
Review your 90-day metrics
- Analyzing growth and engagement data – Look at member growth, activity levels, participation patterns, and content performance to identify trends and inform your strategy.
- Comparing results against initial goals – did you exceed expectations? Struggle to meet them? By comparing your outcomes, you can begin to analyze effective strategies (and those that can be left behind).
- Identifying successes and areas for improvement – highlight what worked well and where changes could improve the member experience.
- Calculating key performance indicators – remember to use your defined KPIs! They will help you evaluate whether the community is gaining traction or stagnating.
Gather comprehensive feedback
- Conducting member surveys – ask members what they value, what’s unclear, and what would make the community more useful. (Hint: You may need to incentivize this.)
- Hosting feedback sessions or town halls – create live opportunities for members to share ideas, concerns, and suggestions in their own words. You never know what ideas will bubble to the surface in a live conversation.
- Analyzing behavioral data and patterns – review how members actually participate so you can adapt your programming to their needs.
- Identifying unmet needs and opportunities – what are members asking for, struggling with, or trying to accomplish that your community does not yet support? Here’s where you can begin to identify the next stage of growth.
Plan your next 90 days
- Setting new goals based on learnings – create updated goals that reflect what you now know about your members, content, and your team’s capacity.
- Prioritizing features and improvements – focus on the changes most likely to improve engagement, retention, or member value.
- Developing advanced engagement strategies – plan deeper programming, leadership opportunities, or connection points that build on early momentum.
- Creating a sustainability plan for long-term growth – identify the people, systems, content, and resources needed to maintain the community over time.
Document lessons learned
- What worked well and should be continued – identify the activities, formats, and systems that delivered clear value and deserve ongoing investment.
- What didn’t work and why – be honest about what fell flat so you can adjust your approach instead of repeating weak tactics.
- Unexpected challenges and solutions – Document problems—from technical to behavioral—how you handled them, and what you would do differently next time.
- Best practices for ongoing community management – turn your lessons into practical guidelines your team can use moving forward.
Common pitfalls and how to avoid them
In our experience, the most common mistakes when launching an online community come from a lack of planning or overly ambitious goals. Take the time to identify your community’s purpose and strategy. This will help you choose the best platform for your organization AND your members. Do your homework and build plenty of content in advance, make a moderation plan, establish a realistic posting schedule that won’t cause burnout for you and your team.
It’s also important to start small. Don’t launch your community with every module activated. Not only will it be overwhelming for your first members who will be adapting to a new environment, it will also be challenging to maintain numerous tools. There’s also a good chance your members won’t actually need or like every feature, so you’ll have spent hours—if not days—building them out.
As you’re growing your community, keep an eye out for common warning signs. Low engagement and member churn are big signals that something’s not working. And don’t forget to keep an eye on your team as well. How are they faring with the new work load and responsibilities? Ensure they have the tools in place to continue building a healthy community for the long haul.
Beyond the launch
As you shift from launch to growth, start thinking about your community’s long term sustainability. Invest in continuing education for your team to ensure that not only are they up-to-date on best practices, but you’re supporting their career as well. Remember, community building is iterative and never let perfect be the enemy of good!